 |
| Round 1 Cake Pops - for my own birthday party |
CAKE POPS

Left over cake or brownies (hopefully made from scratch)
Icing (preferable homemade buttercream - recipe to come later, I use cream cheese icing for the brownies but you get creative with anything - peanutbutter, sour cream, honey, etc.)
ChocolateIcing (preferable homemade buttercream - recipe to come later, I use cream cheese icing for the brownies but you get creative with anything - peanutbutter, sour cream, honey, etc.)
Parafin Wax (optional - but I'll tell you why)
Lolipop Sticks (found some at Walmart but I know they also have them at Hobby Lobby)
I did 2 round of cake pops. The first round I used left over yellow cake which was so moist I didn't even need to add icing to get them to form balls & left over brownies that were iced with cream cheese icing.
 |
| Sour cream crumb cake with Italian buttercream |
The second round, I used left over sour cream crumb cake with "gone-wry" Italian buttercream (a meringue-based buttercream). I messed up this buttercream a while back but the flavor was still amazing so I thought I'd salvage it here. After the balls were formed, I refrigerated them for 15 minutes & moved onto the chocolate.
My 1st round I went through the tedius task of "tempering" the chocolate. Now, I didn't do the traditionals heat it up, cool it down, heat it back up to 88 degrees (I don't have a infrared chocolate thermometer or a marble slab...gift idea?...so that was not an option). Instead I took a tip from Alton Brown (my food science hero) after watching his special on chocolate, tempering is all about the crystals. He says to just warm up the chocolate to 90-92 degrees before dipping and that should do the trick...but again I have no chocolate thermometer so I thought...
When they make sugar from sugar cane, they start off with a supersaturated soup and only need to add 1 sugar crystal for the whole thing to form solid cystals. With that knowledge, I tried my own chemistry-based technique (not really sure if chocolate experts would agree with me here but it seemed to work).
Method 1:
I melted the chocolate chips (flavor of your choice, I found dark overpowered my cake but went well with my brownies) in a double boiler until all was melted into a thin liquid (not worried about temp really). I figured out after a few tries that it was a good idea to dip the sticks in the chocolate then insert into the cake/brownie balls & let them dry before moving on to the next step.

The only pain with this method is that the chocolate will only stay thin for 2-3 pop dips, so you have to put it back on the boiler get it thin, add your seed chip & continue. Beats tempering though and you will get a shiny chocolate.
I'm thinking next time I will try keeping the chocolate on the double boiler the whole time and just continuing to add "seed chips" every 5 minutes or so.
Method 2

I also like to add a dash salt &/or nutmeg to my melted chocolate in both methods, it enhances the flavor of the chocolate so much but note that neither of these will dissolve in your chocoalte. You will be able to see the little grains, which I didn't really care about since my motto is flavor trumps looks.


Another good tip here for both methods is to use a crock pot as the bottom of your double boiler, the heat is low and more even than a pot on the stove.
However, you can avoid both methods 1 & 2 by buying candy wafer which come in varoius flavors and colors. These you can just melt and not worry about chocolate seizing at all....I bought some vanilla one's for future runs. The few extra dollars are worth my time :)
 |
| Yum! |
CHOCOLATES
 |
| Russell Stover....psh I can do that. |

I did my chocolates at the same time as rounds 1 & 2 of my cake pops using method 1 chocolate on my heart chocolates (which I used a heart shaped ice cube mold for) & method 2 chocolate on my "mini muffin tin" chocolates. But really, these were all about the fillings. I found method 1 worked best for the chocolate candies because chocoalte should snap when you eat a filled chocolate candy (this was missing with the parrafin).
For both types of chocolates, I filled the molds with chocolate and shimmied/shook the chocolate around to fill the mold on the top & sides. Make sure to get a thick layer of chocolate on all sides or you will pay the price when you try to remove them from the molds. Then I left them upside down for the excess chocolate to drip out. After about 5 min, I took my offset spatula and removed the excess from around edges of the molds & then put them in the freezer for abot 10 min.
NOW FOR THE FILLINGS!!
My favorite part. I did 4 different chocolate here:
1) Sunflower seed nuts + peanut butter: spruced up the peanut butter with confectioner's sugar, vanilla & salt.

2) Coconut whipped cream + sliced almonds: whipped up some heavy whipping cream & added sweatened canned coconut.
3) Strawberry + cream cheese: sorry yall, these are both left-overs from my secret king cake fillings, but i'll tell you they both involve liquor of some sort
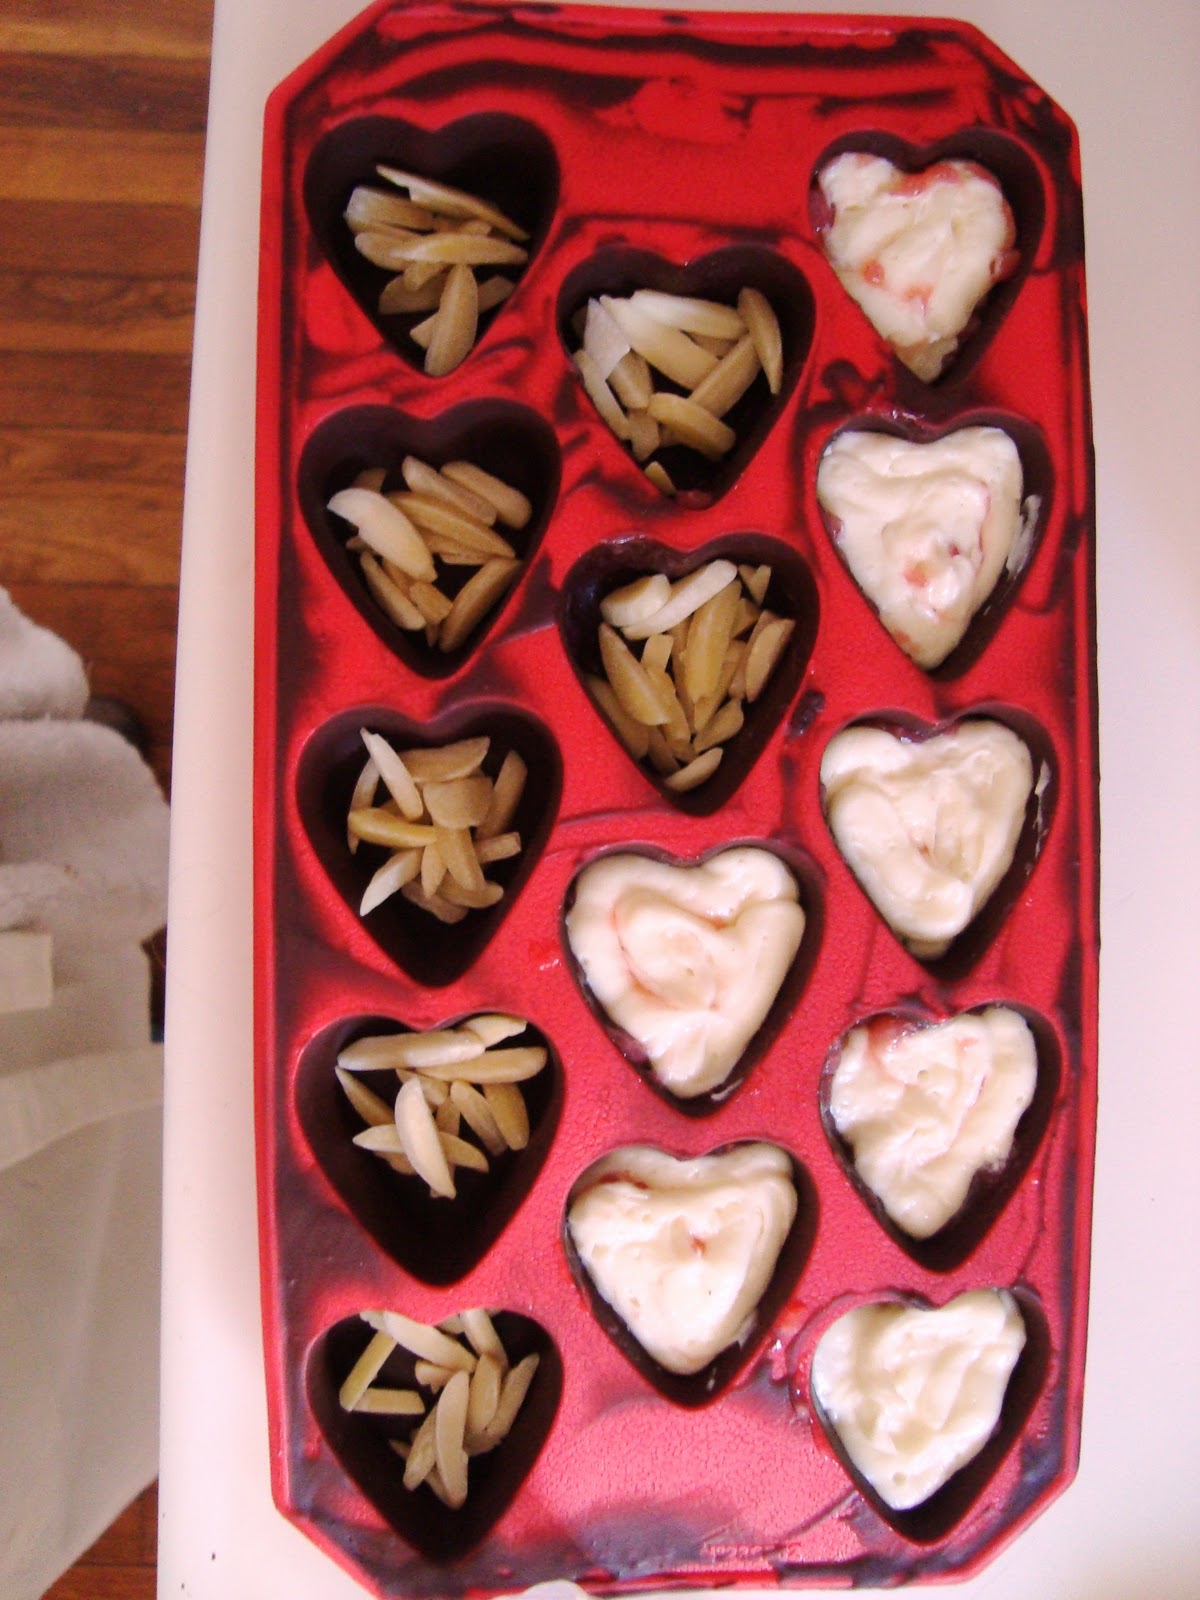
4) Cookies-n-Cream: Bingham's favorite since I was making these for Valentine's day, just white chocolate with mashed Oreos


Just because some broke doesn't mean they aren't delicious!! So I salvaged them. The cookie-n-cream ones didn't break though (we just cut them to taste)... solid chocolates are much easier.
 |
| Bingham's Valentines Chocolates - we got our finger prints all over um |
 |
| Mended Broken Heart!! |
 |
| Cupcake tin chocoaltes - much less breakage |
COOKIES
 |
| Royal Icing |
I've tried a couple of recipes for the icing. My top 2 were Royal icing which uses egg whites & corn syrup based one from I Am Baker. Here's my reviews on the 2:
Royal Icing
Dries quickly
Less forgiving
(because it dries quicker)
Subtle sweet flavor
 |
| Phi Mu Cookie w/ Royal Icing |
I Am Baker Icing
Dries REALLY slow
(3+ hours, I found it goes a little quicker in the fridge)
Really forgiving
(you can basically remove half of what you've done and start over)
Pungently sweet
 |
| Phi Mu Cookie w/Other Icing |
 |
| 5th Birthday Cookies |
I think I'm going to stick with the royal icing. Its easier to work with if your fast.
These Star Wars character were kind of fun but time consuming. I put them on skewers becase they served as cake toppers. I used royal icing on these.
 |
| CP3O, Yoda, R2D2, Luke & an Ewok...the whole crew! |
 |
| Amateur LSU Cookies |
No comments:
Post a Comment